Moving to Yamate › Xero
How to export your data from Xero
What to click in Xero, which files you get, and what can’t come across. Checked 6 October 2026.
Before you start: You need a Xero login with Standard or Adviser access.
Contacts
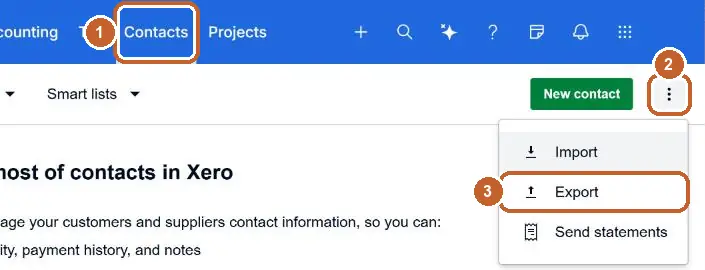
- Open Contacts → All contacts.
- Tap the ⋮ menu at the top right, then Export. The file downloads straight away.
- It has your suppliers in it too — untick them on Yamate's tick-list, or bring them in as suppliers.
Sales invoices
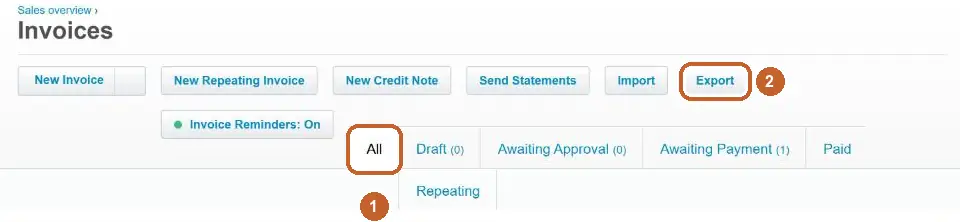
- Open Sales → Invoices and pick the All tab.
- Tap Export. It gives one row per invoice line; export a date range at a time if you have more than 500 invoices.
Bills
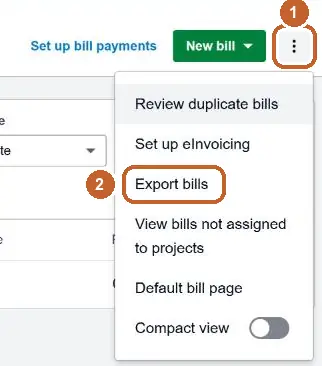
- Open Purchases → Bills.
- Tap the ⋮ menu at the top right, then Export bills. Keep the word bills in the file name.
Products and services
- Open Sales → Products and services.
- Tap Export, then CSV.
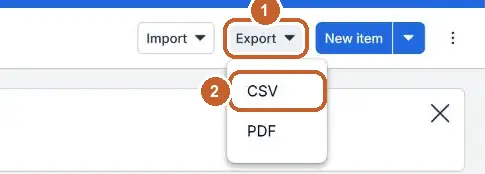
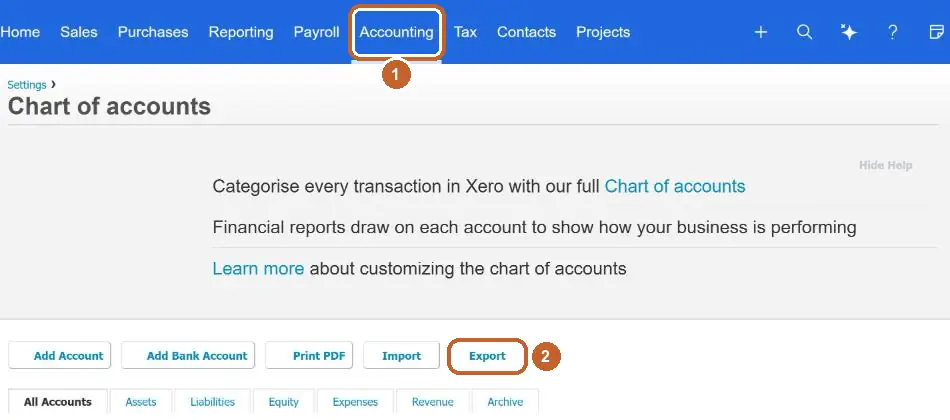
Chart of accounts
- Open Accounting → Chart of accounts.
- Tap Export. Yamate only uses it to sort your bills into categories.
What can’t come across
- Attachments and files
- Bank transactions (Yamate does not need them)
Then bring it into Yamate
- Open Yamate and go to Settings → Your data → Import data. New accounts are asked once, after the welcome.
- Drop all the files in at once — CSV, Excel or ZIP. They are read on your phone or computer.
- Check the tick-list. Owed invoices stay owed, paid ones count as paid, and nothing you already have is changed.
- Tap Add. Anything you untick is left out.
Checked 6 October 2026 in a real Xero account and against Xero’s own help pages. Yamate isn’t affiliated with Xero; the name belongs to its owner.
- central.xero.com/0/article/Export-contacts-out-of-Xero — read 6 October 2026
- central.xero.com/0/article/Export-invoices-and-bills — read 6 October 2026
- go.xero.com/ — read 6 October 2026